
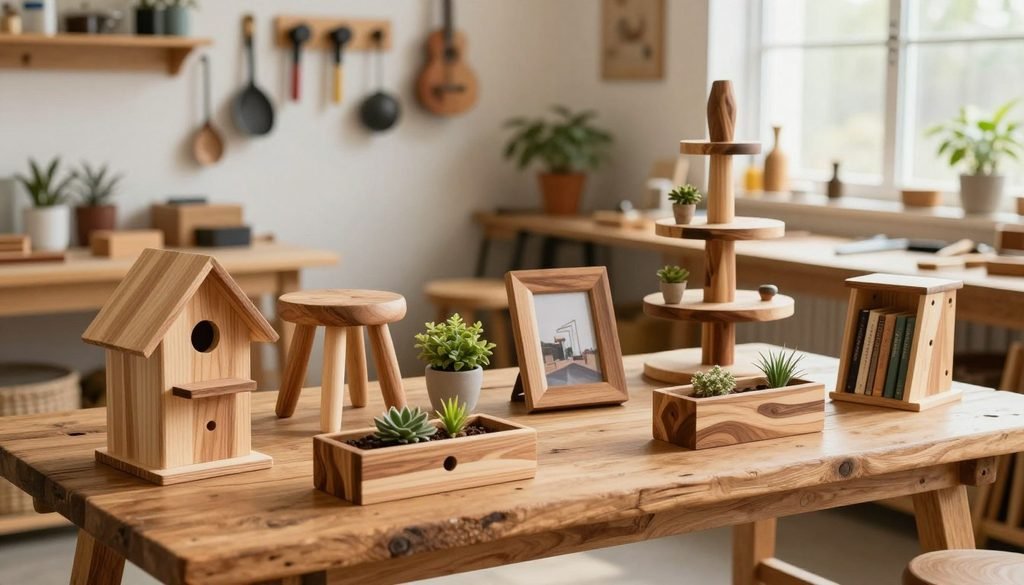
I know the feeling of staring at a growing pile of lumber remnants in the corner of my shop. It often feels like clutter, but I have learned that these small offcuts hold endless potential for beautiful home additions.
Instead of letting those boards gather dust, I transform them into functional organizers or thoughtful gifts. You do not need a massive budget or a professional studio to build something meaningful. My goal is to show you how these 16 simple and creative scrap wood projects can turn your leftovers into items you will use every single day.

Edit
Full screen
Delete
16 Simple and Creative Scrap Wood Projects
Whether you are a beginner or a seasoned builder, these ideas offer a quick way to sharpen your skills. Let’s clear that workspace while making your home feel more personal and organized.
Key Takeaways
- Transform leftover lumber into functional home decor and organizers.
- Save money by repurposing materials you already have on hand.
- Build unique, handmade gifts that carry a personal touch.
- Reduce workshop clutter through efficient material management.
- Develop your woodworking skills with quick, manageable tasks.
Before I Start: Choosing and Preparing Scrap Wood
Transforming random scraps into beautiful woodworking projects 木工項目 requires a bit of preparation and a keen eye for detail. I have found that taking the time to organize my materials makes the entire building process much smoother and more enjoyable.
Sort Boards by Size, Species, and Condition
I start by grouping my leftover lumber by dimensions, wood type, and overall quality. Keeping similar pieces together helps me visualize what I can build without digging through a messy pile.
Check for Nails, Screws, Splinters, Rot, and Chemical Treatments
Safety is my top priority when handling reclaimed wood. I carefully inspect every board for hidden metal fasteners like nails or screws that could damage my saw blades. I also look for signs of rot, mold, or suspicious chemical treatments, especially on old fence pickets or pallets, and I discard anything that looks questionable.
Match Each Piece to the Right Project
Once I have a clean, safe pile, I match specific boards to the best woodworking projects 木工項目. For instance, I save my clearest, straightest pieces for visible surfaces and use rougher, weathered scraps for hidden structural supports or rustic decor.
Gather Beginner-Friendly Tools and Supplies
Having the right gear makes every task feel like a breeze. I prefer to keep my setup simple so I can focus on the joy of creating rather than managing complex machinery.
Essential Cutting, Drilling, Sanding, and Measuring Tools
My basic kit includes a reliable tape measure, a speed square, and a sharp handsaw or a compact circular saw. I also rely on a cordless drill and a variety of sandpaper grits to smooth out rough edges. These tools are perfect for beginners tackling various woodworking projects 木工項目 in a home workshop.
Simple Safety Practices for Indoor and Outdoor Work
I always wear safety glasses and a dust mask to protect myself while cutting or sanding. It is truly important to keep my workspace clear of debris to prevent tripping hazards. By following these simple habits, I ensure that my time in the shop remains safe and productive.
16 Simple and Creative Scrap Wood Projects
Let’s dive into some easy scrap wood projects 簡單易行的廢木項目 that will sharpen your skills while organizing your space. You do not need a massive workshop or expensive lumber to create beautiful, practical items for your home. These builds are perfect for using up those leftover pieces that usually end up in the trash.
Rustic Wall-Mounted Key Holder
Materials, Dimensions, and Hardware
For this project, I typically look for a piece of pine or cedar measuring about 6 inches by 10 inches. You will need a few brass or matte black hooks, a piece of sandpaper, and some wood glue. Quality hardware makes a huge difference in the final look of your piece.
Steps for Adding Hooks and a Decorative Finish
First, sand the wood until it feels smooth to the touch. I prefer applying a dark walnut stain to give it a classic, rustic appearance. Once the stain dries, measure and mark where your hooks will sit, then screw them firmly into the board.
Ways I Customize It for an Entryway or Mudroom
I often add a small shelf on top for mail or a tiny succulent. You can also paint the wood with a distressed white finish if you prefer a farmhouse aesthetic. It is one of my favorite beginner woodworking projects適合初學者的木工項目 because it is so versatile.
Small Floating Shelf
How to Choose a Straight Scrap Board
Finding a straight board is essential for a shelf that sits flush against the wall. I check for warping by laying the board on a flat surface and looking for gaps. A piece of oak or maple works best for strength, but pine is fine for lighter items.
Installing a Hidden or Visible Shelf Support
For a hidden look, I use a floating shelf bracket that slides into pre-drilled holes in the back of the wood. If you prefer a visible support, simple L-brackets painted to match your wall color work perfectly. Always use a level to ensure your shelf is perfectly horizontal.
Styling Ideas for Photos, Plants, and Small Keepsakes
These shelves are perfect for displaying small framed photos or trailing plants. I like to group items in odd numbers to create a balanced, professional look. It is a simple way to add character to any empty wall in your home.
| Project Name | Difficulty Level | Estimated Time | Primary Use |
| Key Holder | Beginner | 1 Hour | Organization |
| Floating Shelf | Intermediate | 2 Hours | Display |
| Phone Stand | Beginner | 30 Minutes | Tech Support |
Scrap Wood Projects for the Kitchen and Dining Area
You can easily transform leftover lumber into functional kitchen tools with these simple diy furniture ideas. Adding natural wood elements to your cooking space brings a sense of warmth and character that store-bought plastic items simply cannot match.
Wooden Cookbook or Tablet Stand
A sturdy stand keeps your recipes at eye level while you cook. It prevents spills and keeps your counters organized.
Creating the Slanted Backrest and Front Ledge
To build the backrest, cut two pieces of wood at a slight angle to ensure the stand leans back comfortably. Attach a small horizontal ledge at the bottom to hold your book or tablet securely in place.
Sanding and Sealing for Easy Cleaning
Kitchen surfaces must be smooth to prevent food particles from getting stuck. I recommend sanding the wood thoroughly with fine-grit paper and applying a food-grade mineral oil to seal the grain.
Adjusting the Size for Cookbooks, Tablets, or Recipe Cards
You can customize the dimensions based on your needs. A wider base works best for heavy cookbooks, while a narrower, taller design is perfect for a tablet or small recipe cards.
Rustic Serving Tray
A handmade tray is a versatile piece that serves as a great example of 自制傢俱創意. It is perfect for carrying drinks or displaying seasonal decor on your dining table.
Assembling the Base and Adding Simple Handles
Start by gluing and nailing thin plywood or solid wood slats to a frame to create a flat base. Attach simple metal or wooden handles to the sides to make it easy to carry.
Choosing Food-Safe Finishes and Decorative Details
If you plan to serve food directly on the tray, always use a finish labeled as food-safe, such as beeswax or butcher block oil. Avoid standard wood stains or varnishes that contain toxic chemicals.
Using Reclaimed Wood Safely Around Food
Be cautious when using old or reclaimed wood for food-related projects. If you do not know the history of the wood, it is safer to use it for decorative trays rather than surfaces that touch food directly.
| Project Type | Best Wood Species | Recommended Finish |
| Cookbook Stand | Pine or Poplar | Clear Polyurethane |
| Serving Tray | Hardwood (Oak/Maple) | Food-Grade Mineral Oil |
| Decorative Blocks | Scrap Cedar | Natural Beeswax |
Easy Scrap Wood Projects for Home Organization
I find that the most satisfying woodworking projects are those that turn chaos into order. You do not need a full lumber yard to create functional storage solutions for your home. By utilizing small offcuts, you can complete easy scrap wood projects that keep your daily essentials tidy and accessible.
“The secret to a peaceful home is having a place for everything, even the smallest items.”
Entryway Mail and Message Organizer
An entryway often becomes a dumping ground for letters and keys. Creating a dedicated station helps you manage this clutter effectively.
Building Compartments from Narrow Offcuts
You can use thin strips of plywood or pine to build vertical slots. Simply glue and nail these pieces to a backboard to create custom-sized compartments for your mail.
Adding Labels, Hooks, or a Small Chalkboard
To make your organizer more functional, attach small brass hooks at the bottom for your keys. You might also paint a section with chalkboard paint to leave quick notes for your family. These 簡單易行的廢木項目 add a personal touch to your entryway.
Mounting the Organizer Securely on the Wall
Always use a level to ensure your organizer hangs straight. I recommend using heavy-duty wall anchors to keep the unit secure, especially if you plan to hang heavy key rings or bags.
Desktop Phone and Charging Station
A messy desk filled with tangled wires is a major distraction. A custom charging station keeps your devices organized and ready for the day.
Drilling Cable Channels Without Splitting the Wood
When drilling channels for your charging cables, use a sharp spade bit and go slowly. Pro tip: place a piece of scrap wood underneath your workpiece to prevent the exit hole from splintering.
Making Space for a Phone, Watch, and Earbuds
Design your station with tiered levels to accommodate different devices. A small notch for your watch and a dedicated tray for earbuds will keep your nightstand or office desk looking pristine.
Finishing Options for a Clean Office or Nightstand Look
A light sanding followed by a clear wax finish works wonders for these easy scrap wood projects. This simple step protects the wood while highlighting its natural grain, giving your desk a professional and polished appearance.
Beginner Woodworking Projects for Living Spaces
I love how a few simple pieces of scrap wood can elevate the look of any room in my home. These beginner woodworking projects (適合初學者的木工項目) are perfect for utilizing those small offcuts that usually end up in the trash. By focusing on small-scale decor, you can practice your skills while adding a personal touch to your living area.
Scrap Wood Picture Frame
Joining Four Pieces with Straight or Mitered Corners
Building a frame is a classic way to start your journey. You can choose between simple butt joints, which are easy to assemble with glue and nails, or mitered corners for a more professional look. Mitered corners require a 45-degree cut on each end, providing a seamless appearance that hides the end grain.
Adding a Backing, Glass, or Easel Support
Once your frame is joined, you will need to create a rabbet or a simple groove to hold your glass and photo. If you use plexiglass, remember to drill slowly to prevent cracking the material. Adding a small wooden easel support on the back allows your frame to stand upright on any shelf or desk.
Creating a Rustic, Painted, or Two-Tone Finish
The finish you choose defines the final aesthetic of your piece. A rustic look works well with a light sanding and a clear wax, while a two-tone paint job can add a modern flair. I often use a dark stain on the inner edge and a bright paint on the outer frame for a striking contrast.
| Joint Type | Difficulty | Visual Appeal | Best For |
| Butt Joint | Easy | Rustic | Beginners |
| Mitered Joint | Moderate | Professional | Display |
| Splined Miter | Advanced | Decorative | Heirlooms |
Geometric Wood Wall Art
Planning a Simple Pattern from Assorted Offcuts
Geometric art is one of my favorite beginner woodworking projects because it is so forgiving. Start by laying out your scrap pieces on a flat surface to experiment with different shapes. You do not need a complex plan; simply follow your intuition to create a pattern that feels balanced.
Cutting, Arranging, and Attaching the Pieces
After you finalize your design, cut your pieces to size using a miter saw or a hand saw. Arrange them on a thin plywood backing board and secure them with wood glue and small brad nails. Ensure that every piece is flush to create a smooth, professional surface.
Balancing Color, Grain Direction, and Wall Placement
To make your art pop, consider the direction of the wood grain. Alternating the grain direction creates a beautiful texture that catches the light differently. Finally, balance your colors by mixing light and dark wood species to ensure the piece complements your existing home decor.
DIY Furniture Ideas Made from Leftover Lumber
I love the challenge of turning odd-sized boards into practical diy furniture ideas that actually serve a purpose in my home. While small accessories are fun, building furniture requires a bit more attention to structural integrity and design. Whether you are crafting an ergonomic laptop stand or a portable lap desk, these projects prove that even small offcuts can become high-quality pieces.

Edit
Full screen
Delete
diy furniture ideas
Compact C-Shaped Sofa Table
Designing the Top and Base for Stability
A C-shaped table is a fantastic project because it slides right under your furniture. To ensure it stays upright, I always design a wide, heavy base that counterbalances the weight of the top. Using thicker scrap wood for the bottom section provides the necessary gravity to keep the table from tipping over.
Joining the Pieces with Screws, Dowels, or Pocket Holes
Strength is vital when building furniture. I prefer using pocket holes for a clean look, but wood glue combined with dowels creates an incredibly durable bond. Always pre-drill your holes to prevent the wood from splitting, especially when working with older, dried-out lumber.
Adapting the Table for a Sofa, Bed, or Reading Chair
The beauty of this design is its versatility. By adjusting the height of the vertical support, you can easily customize the table for a low sofa or a taller reading chair. It serves as a perfect surface for a morning coffee or a quick workspace, showcasing the true potential of 自制傢俱創意.
Simple Wooden Step Stool
Building Strong Legs and a Nonslip Top
A sturdy step stool is a must-have in any kitchen. I focus on building thick, reinforced legs that are securely attached to the frame. Adding a nonslip grip tape or a textured finish to the top surface ensures safety for everyone in the house.
Testing Weight Capacity and Preventing Wobble
Before I finish the project, I always perform a weight test to ensure the joints hold firm. If I notice any movement, I add corner braces or gussets to eliminate wobble. A stable stool gives me peace of mind whenever I need to reach those high pantry shelves.
Choosing a Safe Finish for Everyday Household Use
Since a stool gets handled constantly, I choose a non-toxic, durable finish like hard wax oil or a water-based polyurethane. These options protect the wood from moisture and daily wear while remaining safe for family members. A well-finished piece of furniture will last for years to come.
Stop Wasting Wood on Incomplete Plans—Build What You Picture, Every Single Time.
Tired of missing measurements, skipped steps, and confusing diagrams? TedsWoodworking gives you instant access to over 16,000 fully tested, step-by-step woodworking plans.
- Laser-Accurate Details: Get exact cutting lists measured to 1/16″, full materials lists, and multi-angle exploded schematics.
- Beginner & Budget Friendly: Designed for standard tools (table saw, drill, clamps) and small shop spaces—no $5,000 equipment needed.
- Lifetime Access & Free Monthly Drops: Pay once and get new plans added every month, plus custom plan requests at no extra charge.
👉 [Click Here to Get Instant Access to 16,000+ Woodworking Plans and Start Your Next Project Today!] https://b6c1b8qft6hzgx8dn-3ip5uc2a.hop.clickbank.net
Repurposed Wood Crafts for Outdoor Use
Turning forgotten wood pieces into outdoor treasures is one of my favorite weekend activities. These repurposed wood crafts 改造過的木製工藝品 allow me to extend my workshop creativity into the garden, patio, or sunny balcony. Whether you are building a 4×4 solar light stand or a tiered plant stand, working with salvaged materials brings a unique charm to any landscape.
Hanging Bird Feeder
Creating a Weather-Resistant Roof and Seed Tray
A bird feeder needs to keep seeds dry to prevent mold. I always build a sloped roof using thin scrap plywood to ensure rain runs off quickly. The seed tray should have small gaps or mesh at the bottom to allow moisture to escape, keeping the food fresh for your feathered visitors.
Choosing Safe Placement and Easy-Clean Features
Placement is vital for both bird safety and your convenience. I prefer hanging my feeders in areas that are visible from the house but protected from strong winds. Designing the feeder with a removable base or a hinged side makes it much easier to scrub out old hulls and debris.
Protecting the Wood with an Outdoor-Appropriate Finish
Since these feeders face the elements, a durable finish is non-negotiable. I recommend using a non-toxic, water-based exterior sealer to protect the wood without harming the birds. Regular maintenance ensures your project lasts through many seasons.
“The best gardens are those that invite nature in, and a simple wooden feeder is the perfect bridge between your home and the wild.”
Small Planter Box
Adding Drainage Holes and a Protective Liner
When crafting planters, drainage is the most important factor for plant health. I drill several holes in the bottom of my boxes to prevent root rot. Lining the interior with heavy-duty plastic helps extend the life of the wood by keeping damp soil away from the boards.
Choosing Plants for Sun, Shade, or a Windowsill
You can customize your reclaimed wood diy projects利用回收木材的 diy 項目 based on your light conditions. Succulents thrive in sunny spots, while ferns or hostas prefer the shade. I often build smaller boxes specifically for kitchen windowsills to keep fresh herbs within arm’s reach.
Using Reclaimed Wood Without Exposing Plants to Unsafe Chemicals
It is important to be cautious when using old lumber. If you are unsure about the history of the wood, avoid using it for edible plants to prevent chemical leaching. Stick to decorative flowers or ornamental shrubs for these reclaimed wood diy projects利用回收木材的 diy 項目 to keep your garden safe and beautiful.
Creative Scrap Wood Gifts and Seasonal Decor
Transforming leftover lumber into meaningful gifts is one of my favorite ways to spend a weekend. These repurposed wood crafts allow you to turn simple offcuts into high-quality items that feel truly special. Whether you are crafting for a friend or looking for rustic home decor ideas, the process is incredibly rewarding.

Edit
Full screen
Delete
repurposed wood crafts
Personalized Wooden Sign
Preparing the Surface for Paint, Stencils, or Vinyl Letters
Before you begin, ensure your wood surface is smooth by sanding it thoroughly. Start with medium-grit sandpaper and finish with a fine-grit to remove any splinters or rough edges. A clean, smooth surface is essential for getting crisp lines when using stencils or vinyl.
Creating a Family Name, Welcome, or Holiday Design
Once the wood is prepped, you can paint your design or apply vinyl lettering. I often use a simple stencil to create a warm “Welcome” sign for my front porch. Adding a family name makes these pieces perfect for housewarming gifts or holiday presents.
Sealing the Sign for Indoor or Covered Outdoor Display
To protect your hard work, always apply a clear sealant. A polyurethane spray works wonders for indoor signs, while an exterior-grade sealer is necessary for items kept on a porch. This step ensures your repurposed wood crafts last for many years.
Wooden Christmas Tree or Seasonal Tabletop Decor
Cutting Different Board Lengths into a Simple Tree Shape
You can build a charming tabletop tree by cutting scrap boards into varying lengths. Stack these pieces from shortest at the top to longest at the bottom to create a classic silhouette. This project is one of my favorite rustic home decor ideas because it uses up even the smallest wood scraps.
Adding a Base, Paint, Stain, or Miniature Ornaments
Attach your boards to a central dowel or a sturdy backer board to form the tree structure. You can leave the wood natural, apply a rich stain, or paint it in festive colors. Adding tiny ornaments or a small star on top brings the whole piece to life.
Making the Design Adaptable for Multiple Holidays
I prefer to keep my designs neutral so they can transition between seasons. By using removable decorations, you can easily swap out holiday themes throughout the year. This versatility makes your handmade decor a staple in your home during every celebration.
Rustic Home Decor Ideas from Small Wood Offcuts
Small offcuts often end up in the trash, but they are actually perfect for creating charming rustic home decor ideas. I find that even the smallest pieces of lumber hold immense potential for adding warmth to any room. By focusing on simple designs, you can turn your workshop leftovers into beautiful, professional-looking accents.
Wooden Candle Holder
Drilling Safe Candle Recesses or Designing for LED Candles
When crafting candle holders, I always start by measuring the base of my candles. Using a Forstner bit, I drill a clean, flat-bottomed hole that fits the candle snugly. If you prefer a safer option, designing for LED candles is a fantastic way to avoid open flames while maintaining that cozy aesthetic.
Smoothing Edges and Preventing Heat-Related Hazards
Safety is my top priority when working with wood near heat sources. I make sure to sand all edges until they are perfectly smooth to prevent splinters. If using real wax candles, I apply a fire-retardant finish or ensure the wood is thick enough to prevent the heat from reaching the surface below.
Creating a Coordinated Set with Different Heights
I love the look of a trio of candle holders displayed together. By cutting my scrap wood into varying lengths, I create a dynamic visual flow. This simple trick makes even the most basic rustic home decor ideas look like they came from a high-end boutique.
Decorative Wood Bead Garland and Mantel Blocks
Turning Short Pieces into Painted or Stained Accent Blocks
Short, chunky pieces of wood are perfect for making decorative blocks. I often paint these with soft, neutral tones or apply a dark stain to highlight the natural grain. These blocks serve as excellent risers for other small items on a shelf.
Combining Scrap Wood with Twine, Beads, or Fabric
Adding texture is key to achieving a professional look. I enjoy wrapping my blocks in natural twine or attaching wooden beads to create a rustic garland. Mixing in small scraps of fabric, like linen or burlap, adds a soft touch that complements the hard wood surfaces.
Styling the Finished Decor on Shelves, Trays, or a Mantel
Once my pieces are finished, I enjoy arranging them on my mantel. I group them in odd numbers to keep the display balanced and interesting. These rustic home decor ideas are versatile enough to move around whenever I want to refresh my space.
| Project Type | Primary Material | Best Finish | Difficulty |
| Candle Holder | Hardwood Offcut | Clear Wax | Easy |
| Accent Block | Pine Scrap | Matte Paint | Beginner |
| Bead Garland | Wood Beads/Twine | Natural Oil | Beginner |
Finishing, Personalizing, and Caring for Scrap Wood Projects
Proper care and finishing are essential to ensure your hard work stands the test of time. When you invest time in reclaimed wood diy projects, the final layer of protection preserves the natural beauty of the grain. A thoughtful finish transforms a simple build into a professional-looking piece of home decor.
Choose the Right Finish for Each Project
Selecting the correct product depends on the intended use of your woodworking projects. Each finish offers unique benefits that change the texture and durability of the wood surface.
When to Use Paint, Stain, Wax, or Clear Coat
Paint provides a solid, opaque finish that hides imperfections in older wood. Stains enhance the natural character of the grain, allowing the history of the material to shine through. If you prefer a soft, matte feel, wax is an excellent choice for low-traffic items. For high-use surfaces, a clear polyurethane coat offers the best durability and protection against scratches.

Edit
Full screen
Delete
reclaimed wood diy projects
Differences Between Indoor, Outdoor, and Food-Safe Finishes
Outdoor items require weather-resistant sealants that prevent rot and UV damage. Indoor pieces can use lighter finishes, such as water-based polycrylic, which dries quickly and lacks strong odors. If you are crafting items for the kitchen, always choose food-safe oils like mineral oil or beeswax to ensure safety during food contact.
Fix Common Beginner Mistakes
Even experienced builders encounter issues during the assembly process. Learning to address these small errors early will significantly improve the quality of your finished work.
Repairing Cracks, Uneven Cuts, and Rough Edges
Wood filler is your best friend when dealing with small cracks or gaps in your boards. For rough edges, sanding is the key to achieving a smooth, professional touch. If you notice an uneven cut, use a sanding block to level the surface before applying your final stain or paint.
Improving Stability, Alignment, and Hardware Placement
Stability often comes down to ensuring your joints are square and tight. If a piece feels wobbly, check your alignment and add wood glue or extra fasteners for reinforcement. When installing hardware, always pre-drill your holes to prevent the wood from splitting. Taking these extra steps ensures your woodworking projects remain sturdy and functional for years to come.
Conclusion
Turning small pieces of lumber into functional art brings a unique sense of satisfaction to any home. You now possess the skills to tackle these 16 Simple and Creative Scrap Wood Projects with confidence and ease.
My goal was to show you how much potential hides in your scrap pile. Whether you choose to build a small shelf or a custom sign, your efforts reduce waste while adding character to your living space.
I encourage you to head to your workshop and start your first build right now. Exploring these 16 simple and creative scrap wood projects16 個簡單且富有創意的廢木製作項目 will sharpen your skills and spark your imagination for future designs.
Do not let those leftover boards gather dust in the corner. Grab your tools, pick a design, and enjoy the process of creating something beautiful from materials you already own.
FAQ
What are the best 16 simple and creative scrap wood projects for a total beginner?
Some of the best projects include making a rustic key holder, a phone charging station, or simple geometric wall art. These projects focus on basic cuts and joinery, making them perfect for those just starting out with woodworking projects.
Can I use pallet wood for kitchen-based easy scrap wood projects?
I recommend being very cautious. Many pallets are treated with chemicals (look for the “HT” heat-treated stamp). For items like a cookbook stand or serving tray, it is safer to use new offcuts or reclaimed wood that you know is chemical-free. Always use a food-safe finish like mineral oil for any repurposed wood crafts that touch food.
How do I ensure my diy furniture ideas are stable when using scraps?
Stability comes from precise cuts and strong fasteners. I always use a combination of high-quality wood glue and screws. For things like a C-shaped table or a step stool, testing the balance on a flat surface before the glue dries is essential to prevent wobbling.
What tools are essential for reclaimed wood diy projects?
Beyond a saw and a drill, a metal detector is vital to protect your tools from hidden nails. A good random orbit sander is also necessary to transform rough, weathered surfaces into beautiful rustic home decor ideas.
How can I make my scrap wood projects look more professional?
The secret is in the prep work. Sanding through various grits (80, 120, 220) and applying a consistent finish like a stain or a clear polycrylic coat will elevate your beginner woodworking projects from amateur to artisanal.
Are there any specific safety tips for making a wooden candle holder?
Yes! Because wood is combustible, I highly recommend using battery-operated LED tea lights. If you must use real candles, ensure you use a glass or metal insert to keep the flame and heat away from the wood surface.
Stop Wasting Wood on Incomplete Plans—Build What You Picture, Every Single Time.
Tired of missing measurements, skipped steps, and confusing diagrams? TedsWoodworking gives you instant access to over 16,000 fully tested, step-by-step woodworking plans.
- Laser-Accurate Details: Get exact cutting lists measured to 1/16″, full materials lists, and multi-angle exploded schematics.
- Beginner & Budget Friendly: Designed for standard tools (table saw, drill, clamps) and small shop spaces—no $5,000 equipment needed.
- Lifetime Access & Free Monthly Drops: Pay once and get new plans added every month, plus custom plan requests at no extra charge.
👉 [Click Here to Get Instant Access to 16,000+ Woodworking Plans and Start Your Next Project Today!] https://b6c1b8qft6hzgx8dn-3ip5uc2a.hop.clickbank.net
Affiliate Disclosure:
This post contains affiliate links. If you click through and make a purchase, I may earn a small commission at no additional cost to you. I only recommend high-quality, practical resources that offer genuine value to fellow woodworkers. Thank you for your support!